Spring Roo 1.1.0 M1 has just been released and the development on 1.1.0 M2 is just about to start. If you want to check it out from the development stream and see the latest features, here is the tutorial you need. If you are running a Windows operation system this task is quite a bit more challenging. All you ubuntu (and most of the other *nix systems) users only need to do this:
sudo apt-get install git-core gitk

git clone git://github.com/SpringSource/spring-roo.git

cd roo

mvn clean install

sudo ln -s bootstrap/roo-dev /usr/bin/roo-dev
Thats it, seriously! For all the Windows users, read the following paragraphs to accomplish the same.
Installing Git on Windows
First of all you need to install a version of Git for Windows. I decided to not go with the Cygwin + Git option, but instead install Msysgit. A third alternative for Windows is to use Egit for Eclipse, I may discuss that in a couple of days here as well.
There is a nice blog post by Kyle Cordes on the installation of Msysgit. In my case I downloaded version 1.7.0.2-preview double-clicked it and kept all the default installation options (this changed the font style of my cmd shell, but I could change it back later).
Edit: If you get an error like this one Result of cmd.exe /X /C “git log “–pretty=format:Git-Commit-Hash: %H” -n 1″ execution is: ‘1’. you should add {Msysgit_installation}/cmd to your PATH environment variable.
Getting Roo Sources via Git
In the next step you need to create a local clone of the current Roo sources by using Git. Therefore you should create a new folder in which you want to store the files. Right-click that folder and select Git Bash from the context menu. The git command bash opens.
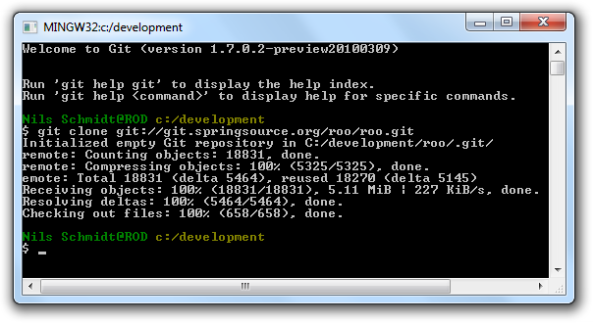
Enter git clone git://github.com/SpringSource/spring-roo.git and wait till it is finished. This will create a new folder named roo. You should see something similar to the picture below.

Building Roo Sources via Maven
Open a windows command shell and switch to the created roo folder. Build the project by typing mvn clean install. (I assume you already have Maven 2 installed, if not do so now). Wait again, this may take a couple of minutes.
Configure Roo-Dev
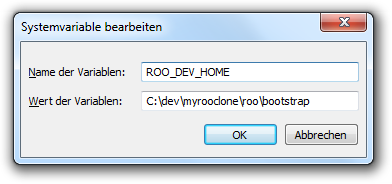
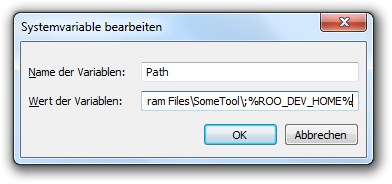
The last thing you need to do is setting up an environment variable called ROO_DEV_HOME in your system settings, which should point to the bootstrap folder within the roo folder. You also need to add this variable to your path environment variable. See the screenshots below (sorry, that those are in German. I guess you mange to set up environment variables anyhow).


Using Roo-Dev
You can now use your build development version of Roo. Just open the windows command shell, type mkdir myproject, cd myproject and roo-dev. By now you should see something similar to the below picture. If so, congratulations! You are now running the current development version of Spring Roo.

Updating Roo-Dev
You may want to update your Roo development version from time to time. Therefore open the GIT shell as you done have before. This time type git pull, which will pull all the remote changes into your local clone. Do not forget to run mvn clean install afterwards to build the changed sources.


